
 |
| The Little Engine That Could |
Well, the group at 4AC-Powered.forumotion.com does exactly that, and sifting through page after page of modification, inquiry, and backyard-engineering you really start to feel a glimmer of hope bubbling up in your chest, 4A-C power is possible!
Is it worth the money? Probably not, but then again Hell yes it is! I admit, I admire 4A-GE too, but something about the underdog nature of 4A-C, I end up rooting for him every time. So this is the post dedicated to how you can pump up 4A-C into something respectable.
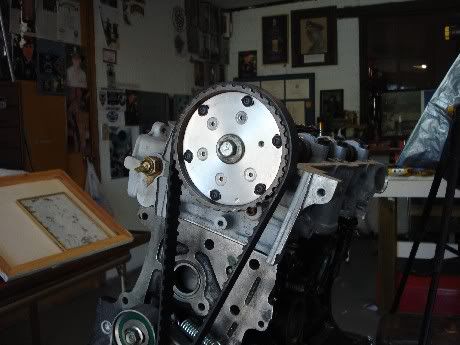
First thing first, take the C out of the equation. The evil octopus, black spaghetti of death, the emissions equipment littering the engine bay has been known by many names, but it's intentions have always been straightforward: to hold you back!
BE CAREFUL IF YOU HAVE TO PASS EMISSIONS THOUGH, TANGLING WITH THE OCTOPUS WILL MOST LIKELY LEAD TO A FAILED VISUAL.
There are tons of videos and explanations for what needs to be done to free your baby up and get it out from under The Man's thumb, and once all the clutter is gone it'll make you feel a lot less anxious when looking under the hood.
Carbs don't have to be bad!
There are good carbs, like the old tried and true Weber 32/36 DGEV Progressive Carburetor. Retailing at around $230 for the carb alone, it can seem like a chunk of change, but breathe easy as there are usually a few used models to be had on Craigslist in your area for around $100-$150 (though a good rebuild might be in order, and don't forget your adapter!). Or, if you just want to spend the cash and get it over with, the Weber Redline K740 kit comes with everything you need (carb, adapter plate, filter) to bolt that baby onto the manifold, and runs just shy of $300.
You've got your Weber on and it's running stronger, and is way cleaner under the hood now that you wrestled the octopus out of there Godzilla style, what next?
Cam it, baby!
The good fellas at Schneider Racing Cams will regrind your camshaft to whatever duration and lift floats your boat! Send your camshaft to their shop in San Diego, along with $120 US, and in a few weeks you'll be hearing some gnarly idling! Don't forget to grab your double valve springs from Schneider while you're at it (~$75), you don't want to float a valve!
What Next?
Now you're cammed, you've got a new carb, and your new double valve springs are in and you're looking for more? You have a couple of options now, Hage Tool and Machine Inc. in Bear, Delaware happens to make Adjustable Cam Gears that look incredible. And a deal for only $100.
And don't forget the flywheel! The stock one sits at more than 20 lbs!!! You can get an after market lightweight 6-bolt flywheel for the 4A-C that weighs 8 lbs, but it'll cost you a chunk of change anywhere between $325(Stillen) - $400(Aasco).
Unfortunately, we're now starting to run out of easily acquired parts and upgrades, from here on out it's handyman corner (unless you're flush with cash).
The exhaust, from the manifold all the way back to the tip, is small and restrictive on a stock 4A-C. And since pacesetter and S&S haven't made headers for this engine for some time, you are either going to have to hawk Craigslist, eBay, and Corolla forums until one pops up, hire a fabricator (or Forum friend) to make you one, or make it yourself. Expect to shell out no matter what direction you go.
Another handyman upgrade is the conversion from a standard internal coil distributor to an external high voltage MSD 6AL with Blaster Coil 2. As explained by 4AC-Powered's own Und-R-Steer, owner of the Ultimate 4A-C, "Once you get into heavy performance modification to your engine, the need for a more precise and powerful spark control becomes important." Makes sense to me, hopefully it makes sense to you. The full instructions are listed on the 4AC-Powered forum and you'll have to become a member to get complete access. (Ha! I knew I would find a way to make 4AC-Powered invaluable at some point!)
Several members have taken their builds further by modifying the factory intake manifold to be more straight-through, having parts specially made/altered, adding the 4A-GE's oil cooler, as well as switching out the bottom end with a more sturdy 7-rib block. The possibilities are endless!
Now you just have to get the suspension set up and you'll be running with the big boys!
Thanks for reading!
SlowTEC
No comments:
Post a Comment